Help users find what they need with clear, logical menu items in the header.
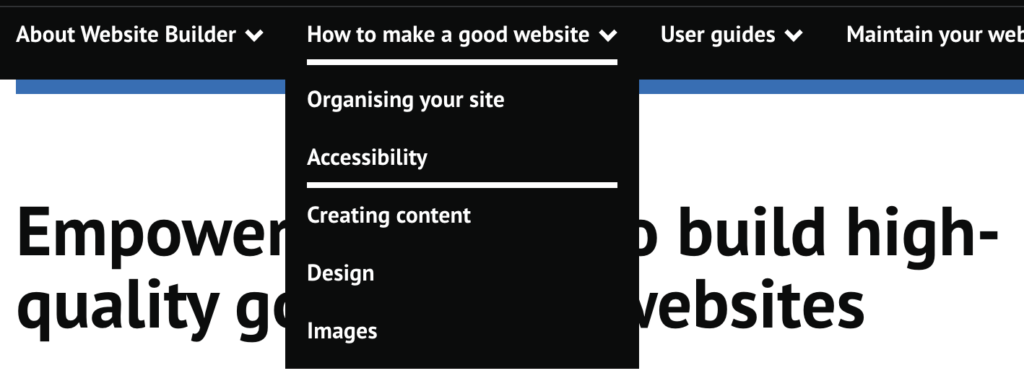
An example of main site navigation is what you can see at the top of the page you’re on now.

Another example of main site navigation from the Prisons & Probation Ombudsman site:

Two levels
Main site navigation has 2 levels.
When users hover over the main headings across the top of the page, it reveals a second level of headings.

Another example of second-level navigation from the Prison and Probation jobs website:

Menu items
When you add a new page to your website, it does not automatically appear anywhere in your navigation menus. You have to add it.
Add menu items in a way that makes sense to your users. Find out how to organise your site.
Label items in a way that makes sense to your users. Group items under main headings where your users expect to find them.
Add items to the main site navigation
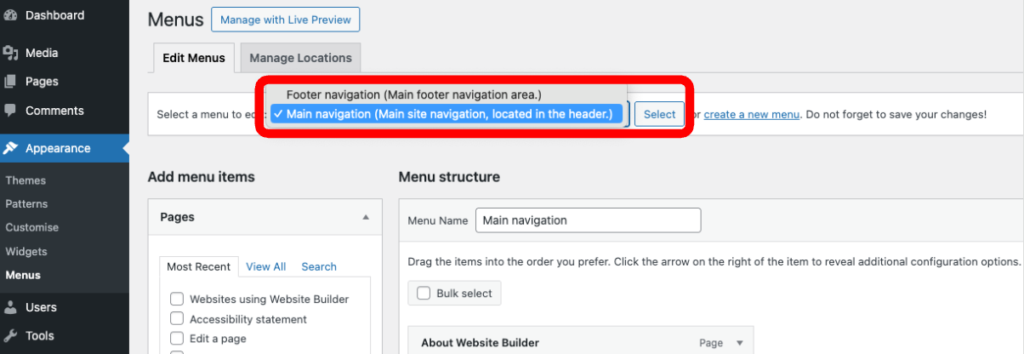
From your site dashboard, go to ‘Appearance’ and then ‘Menus’.

Make sure that the ‘Main navigation’ is selected. If it’s not, click on the ‘Select a menu to edit’ drop down, pick ‘Main navigation’ from the list and click ‘Select’.
If the menus do not yet exist, you can click on ‘create new menu’, but the main menus will usually already be there when we hand a site over to you.

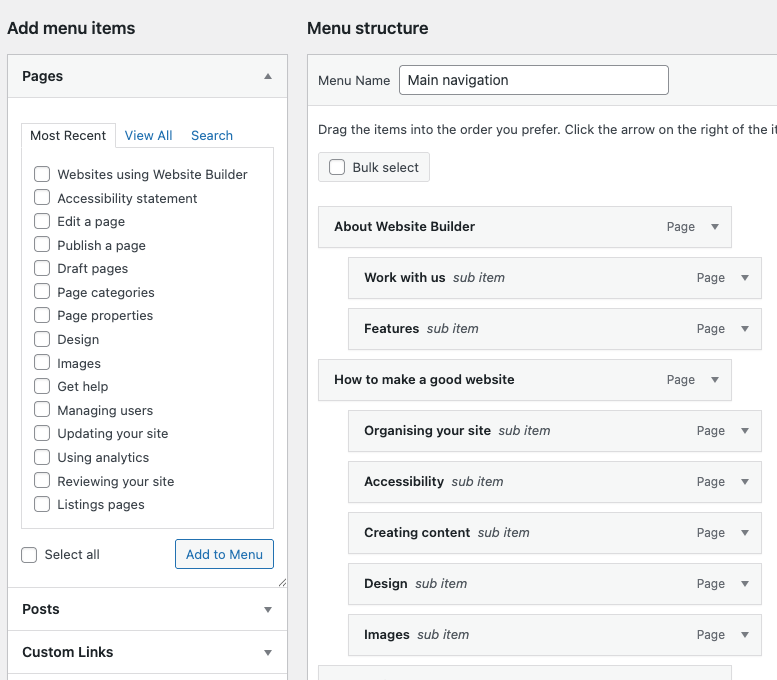
You’ll see 2 sections: ‘Add menu items’ and ‘Menu structure’. This is where you select pages to add to your menu and then arrange them in the order you need.

Select the pages you want to include in your menu by checking the boxes. Then
click ‘Add to menu’.

You can add other items such as a link to an external website by adding the URL under ‘Custom Links’ in the ‘Add menu items’ section. It’s generally not good practice though, as the user may not understand where the link goes. The footer might be a more suitable place to put an external link, if you need to.
You’ll see your chosen pages added to the main navigation list, at the bottom.

To put them in the order you want them to appear, you can drag and drop them by hovering your cursor over them and clicking.
To keep them at the same (top) level of hierarchy, keep them aligned with the other menu items.
To make them into second-level navigation, simply indent them under the main navigation item you want it to belong to.

Remember that there are only 2 levels of navigation in Website Builder. If you indent items any further than a second level, they will not appear in your menu at all.
You can also edit the position of items by clicking on the down arrow icon on the right of each item.
You can rename the navigation item by changing the ‘Navigation Label’, or delete the item by clicking ‘Remove’.

You must save the menu for your changes to take effect. Click ‘Save Menu’ at the bottom of the menu structure.
